Your basket is currently empty!
Vape Maintenance: Cleaning Coils & Tanks for Better Flavour
A clean vape is a happy vape. Regular maintenance keeps flavour crisp, reduces leaks, and extends the life of your kit. This guide walks you—step by step—through cleaning tanks and coils (both stock prebuilt heads and rebuildables). It’s written for UK vapers and shop teams who want an easy, reliable reference.
At-a-Glance Cheat Sheet
- Quick tank clean (between flavours): Rinse, dry, reassemble (10–15 mins + drying time).
- Deep tank clean (weekly or after strong flavours): Disassemble fully, warm soapy wash, rinse, optional vodka/PG soak, dry 100%.
- Stock coil heads: Rinsing can buy you a little time, but burnt coils must be replaced.
- Rebuildable coils (RBA/RTA/RDA): Remove wick → light pulse (no red-hot) → brush/rinse → re-wick.
- Drying: Let everything air-dry completely (ideally overnight). Never reassemble parts while damp.
What You’ll Need
- Bowl(s) of warm water (not boiling)
- A drop of mild, unscented dish soap (for tanks only)
- Paper towels or a microfibre cloth
- Cotton buds / swabs and pipe cleaners
- A soft toothbrush
- Ceramic tweezers (for rebuildables)
- Optional: a small amount of unflavoured vodka or propylene glycol (PG) for stubborn residue (tanks only)
- Optional: ultrasonic cleaner (handy, not required)
- Spare O‑rings (nice to have)
Safety first: Keep e‑liquid away from children/pets. Never immerse a mod/battery. Unplug/remove batteries before cleaning. Avoid harsh chemicals (bleach, isopropyl alcohol) on vape parts that contact e‑liquid.
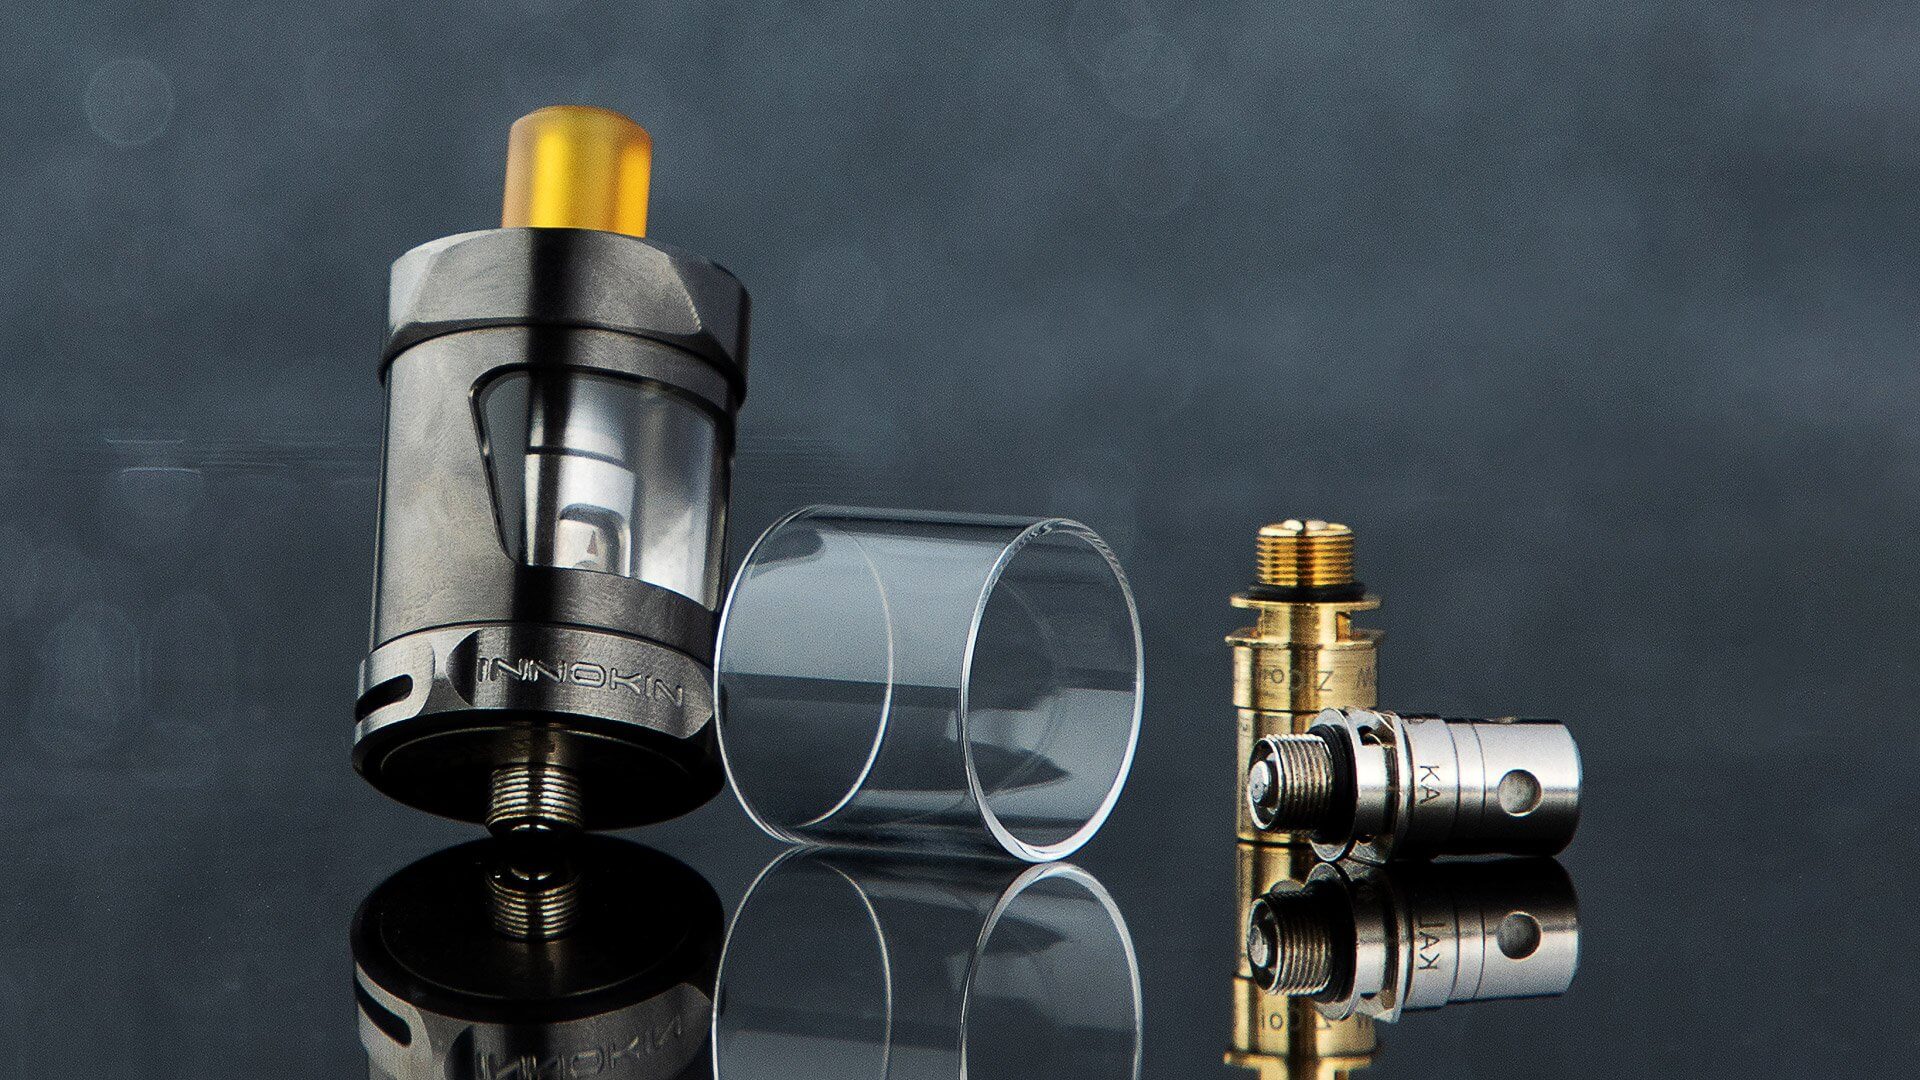
Part 1: How to Clean a Vape Tank (Step by Step)
When to clean
- Quick clean: any time you switch flavours or notice muted taste.
- Deep clean: every 1–2 weeks, or after using strong flavours (menthol, cinnamon, anise), or after a leak.
A. Quick Clean (Between Flavours)
- Disassemble the tank completely: drip tip, top cap, glass, chimney/airflow base. Remove the coil head and set it aside.
- Rinse all tank parts (not the coil) under warm running water for 30–60 seconds.
- Use a soft toothbrush/cotton bud to loosen any visible residue in threads and crevices.
- Shake off water, then pat dry with a microfibre cloth.
- Air-dry the parts on a paper towel for at least 30–60 minutes (longer is better).
- Reassemble the tank, lubricating O‑rings with a tiny smear of e‑liquid to prevent pinching.
B. Deep Clean (Weekly or After Strong Flavours)
- Disassemble fully (as above). Remove O‑rings if they’re loose/worn and set aside so you don’t stretch them.
- Prepare a bowl of warm water + a drop of mild dish soap. Soak parts for 10–15 minutes.
- Brush gently with a soft toothbrush; use cotton buds/pipe cleaners for airflow slots and chimney.
- Rinse thoroughly under warm water until all soap is gone.
- For stubborn flavour ghosting, optional soak in unflavoured vodka or PG for 10 minutes (no isopropyl or perfumed cleaners). Then rinse again with warm water.
- Dry: shake off excess, pat dry, then air-dry completely—ideally overnight. Moisture left inside can cause gurgling and weak flavour.
- Inspect O‑rings for nicks or swelling; replace if damaged to prevent leaks.
- Reassemble, lightly lubricating O‑rings with a tiny drop of e‑liquid.
Pro Tips for Tanks
- Avoid boiling water and sudden temperature changes—can crack glass or warp seals.
- Don’t overtighten parts; snug is enough to protect O‑rings.
- If you’ve had a leak, check the glass is seated and O‑rings are correctly positioned.
- A quick ultrasonic cleaner cycle (warm water only) can speed deep cleans—rinse and dry afterward.
Part 2: Coils—What You Can (and Can’t) Clean
There are two broad types of coils:
- Stock/prebuilt coil heads (the screw-in cartridges for most tanks)
- Rebuildable coils (RBA/RTA/RDA) that you wrap/replace and wick yourself
A. Stock/Prebuilt Coil Heads
Reality check: You cannot reverse a burnt coil. Cleaning can remove surface juice and improve flavour slightly if the coil isn’t burnt, but if you taste burnt/char or see very dark cotton, it’s time to replace.
When a rinse might help: flavour carryover, minor gurgling, or after a sweet e‑liquid.
How to (mild) clean a stock coil head
- Remove the coil from the tank.
- Rinse the coil under a gentle stream of warm water for 60 seconds. Do not use soap.
- Blow through the coil from the open end to push out water. (Optional: gently tap on a paper towel.)
- Air-dry upright for at least 12–24 hours until fully dry. Do not use high heat; it can damage seals.
- Prime & reinstall (see below).
If performance is still poor, replace the coil. Cleaning only buys limited time and won’t fix a burnt wick.
B. Rebuildable Coils (RBA/RTA/RDA)
Good news: You can clean the metal coil and replace the wick for a like-new vape.
Step-by-step: dry-burn & rinse method
- Remove the wick (cotton) with tweezers.
- Pulse at low wattage (short taps) until light residue glows and flakes—do not hold the fire until red‑hot for long.
- Release the fire, allow to cool slightly, then brush/strum the coil gently with a small brush or ceramic tweezers to knock off carbon.
- Rinse under warm water or dip in water, then pulse briefly to evaporate moisture (careful—small pulses only).
- Repeat the rinse + pulse cycle until the coil heats evenly from the centre out.
- Dry fully. Then re-wick with fresh cotton, trim tails, and reassemble.
Mesh RBAs: Avoid prolonged glowing—use very short, low-wattage pulses. Never glow mesh bright red for extended periods.
Priming & Reassembly (After Any Coil Work)
- Prime the coil: put 2–4 drops of e‑liquid directly onto the exposed cotton ports until they look saturated.
- Assemble the tank and fill with e‑liquid.
- Wait 10–15 minutes for full saturation (longer for high-VG juices or very large coils).
- Start low wattage: begin at the bottom of the coil’s wattage range, take a few gentle pulls, then step up.
How Often Should I Clean/Replace?
- Quick tank rinse: every flavour change.
- Deep tank clean: every 1–2 weeks.
- Stock coil heads: typically 1–2 weeks of life (varies by juice sweetness, power, and usage).
- Rebuildable wick: replace whenever flavour drops or after 1–3 days of sweet juices; coil clean every few wick changes.
Signs it’s time for a new stock coil
- Burnt taste, even after priming
- Muted flavour / poor vapour
- Persistent gurgling or leaking
- Very dark cotton or visible scorching
Troubleshooting
- Muted flavour after cleaning → Check that the coil is fully primed; try a few low‑wattage puffs. Verify airflow isn’t blocked.
- Leaking → Inspect O‑rings, tighten (snug), ensure glass is seated, keep wicking ports above juice line when filling.
- Gurgling/flooding → Too much liquid in the coil; remove tank, flick downward into a tissue, take a few short puffs at low power.
- Harsh hits → Wattage too high, insufficient priming, or coil is spent.
FAQs (SEO‑friendly)
How do I deep clean a vape tank (UK)? Disassemble, warm soapy soak (10–15 min), rinse thoroughly, optional vodka/PG soak, air‑dry fully, reassemble.
How do I clean a vape coil without alcohol? For stock coils, warm‑water rinse + 24‑hour dry; for rebuildables, remove wick → light pulse → brush/rinse → re‑wick.
Can I use isopropyl alcohol to clean my tank? Not recommended for parts that contact e‑liquid. If you must, use only a small amount on non‑porous metal/glass and rinse extremely well. Safer options: warm water, mild dish soap, unflavoured vodka, or PG.
Will boiling water clean faster? Risk of thermal shock to glass/O‑rings. Use warm—not boiling—water.
Final Takeaway
Clean tanks and correctly maintained coils give better flavour, fewer leaks, and a longer‑lasting device. Quick rinses between flavours and periodic deep cleans are the difference between a frustrating vape and a consistently great one.
Leave a Reply